Knowing how to shoot videos and edit them can be a dynamic and entertaining way to share some of your process and techniques with your viewers.
In this post I am going to show you what different types of videos you might consider making and what tools you would need.
There are different kinds of videos you might want to consider:
Short videos that will show one aspect of your process:
This might be the easier way to start working with videos, just show one aspect of your painting process, either in real time or as a time lapse.
In this exemple you see me working on the first layers of a painting with fluid acrylics. My camera was on a tripod set up on a table so I could see the 3 canvas on the table.
Time lapse videos showing a painting being made from start to finish:
Making a video that shows your process from start to finish is usually too long to show in real time, so most artists will use a time lapse video. You could also make a video with real time passages and time lapses passages.
You can use captions as I did in the video underneath to add informations and explain what you are doing.
Instructional videos:
Usually shot in real time so you can speak and explain what you are doing, you can also accelerate some passages or make a montage so the video is not too long.
Videos showing a conversation
In this case Sophie Babeanu and I are having a discussion about the Creative Well Being online class, trying not to get too distracted by my cute puppy:)
Conversations are interesting because they are always a bit more dynamic than a single person speaking.
Slideshow videos:
You can make slideshow videos to show your portfolio or like in the video underneath, to promote a group show. Most video editing softwares will have a function that lets ou easily build a slideshow from pictures.
Depending on the type of videos you will want to make, you might need different materials. Here is what I am using from the simplest setting to the more elaborate:
Using your smart phone
You can start by shooting simple time lapse or real time videos with your iphone or smart phone. This is the simplest way and you don’t need a video editor in that case to make the time lapse, your smart phone already has a time lapse setting that will do it for you. You might want to buy a tripod for your iphone though so you don’t have to hold it while filming.
The shooting time limit for lime lapse movies is very long (around 30 hours of shooting) so you could in theory record for a long time as long as our batteries are not empty and you have enough storage space.
Using your digital camera
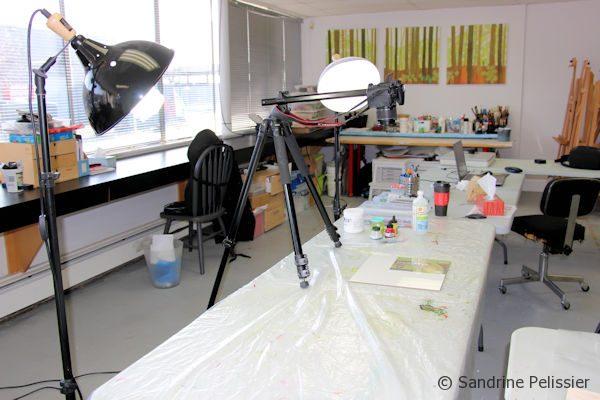
When I want to shoot a video I am going to edit later, then I am using my digital camera, it is a Cannon DSLR. Ideally you would have 2 sources of light at a 45 degrees angle like shown on the picture.
If you are talking on the video, you will also need a microphone that you can place next to you. The camera microphone will pick up all the surrounding noise and might make it difficult for people to hear you clearly.
You can find very inexpensive portable microphones that you can plug to your iphone and record your voice that way.
I also invested in a tripod that can hold the camera parallel to the table and what I am working on.
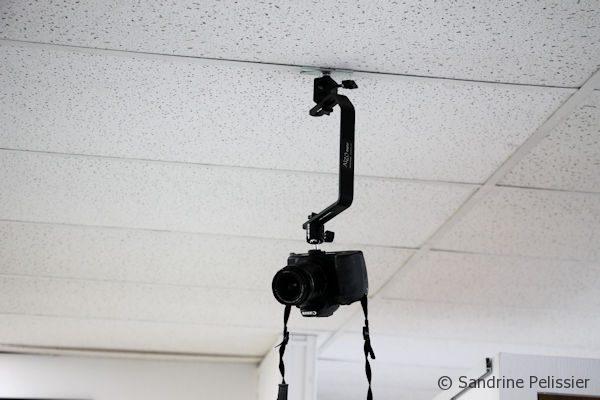
Alternatively, I will use a device that can hold my camera from the ceiling:
Editing your videos
Once you have your videos, you might need to edit them. If you need a very simple edit, like adding a title, captions, music etc.. then I recommend the free utility Windows Movie Maker (you can download it from here).
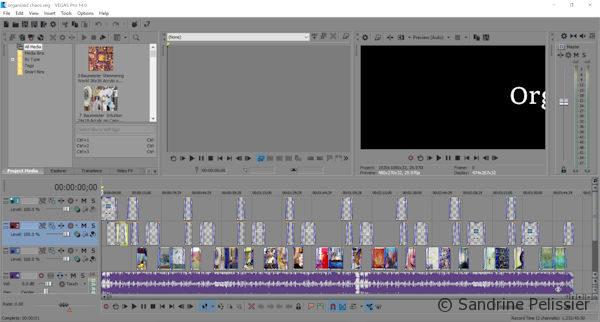
If you need more processing options and don’t mind a bit of a learning curve, then you can try the Sony Vegas video editors. It will take a bit of time and effort to understand how the software works, and I think I am far from using all the capabilities of the program but you can do pretty much any editing you want with this software.
Sony Vegas pro 14 screen shot
What is your favourite way of taking videos of your art process?
Originally from France, I have been living in North Vancouver, Canada for the past 20 years.
My work has been collected and exhibited extensively in Canada and internationally. I am also part of the Art Rentals and sales program of the Vancouver Art Gallery.
Many of my paintings have been published in Art books and magazines (Artist Magazine, Watercolor Artist Magazine, Acrylic Magazine, International Artist Magazine). I wrote 2 art instruction books with North Light/F+W Books.
I have been writing for the last 5 years for my blog: paintingdemos.com, that has a mailing list of about 10 000 subscribers and about 20 000 visitors per month.
I am an active member in the community, as a co-founder of the North Shore Art crawl, a co-founder of a weekly life drawing group, a board member of the North Vancouver Arts Council, and have been invited as a juror for public art, art grants and juried exhibitions. You can read more about my collaborations here.
I use a sony camcorder on a boom tripod so it is positioned directly over my workspace and I can reach it easily, to pause as often as I need to. I haven’t tried editing yet but have several programs to try. Someday I would like to learn…


Comment (1)
Cindy Powell
I use a sony camcorder on a boom tripod so it is positioned directly over my workspace and I can reach it easily, to pause as often as I need to. I haven’t tried editing yet but have several programs to try. Someday I would like to learn…