I am going to show you how to use Paint Shop Pro to print some guides when trying to layer watercolors.
My layers are usually, yellow, red then blue. In that order because yellow is usually not a very transparent pigment, so it’s better to place it under in the staking order so colors won’t get muddy. I then try to use a transparent blue and red.
In this demo I am using Corel Paint Shop Photo pro X3, you can download a trial version for free if you want to give it a try. And I am sure other softwares will have the same features.
Tutorial : Corel Paint Shop Pro for layering watercolors
This is the picture I used to paint this watercolor. Note that I already modified the picture, in paint shop pro, cropping it, adjusting the contrast and color balance.
My reference picture.
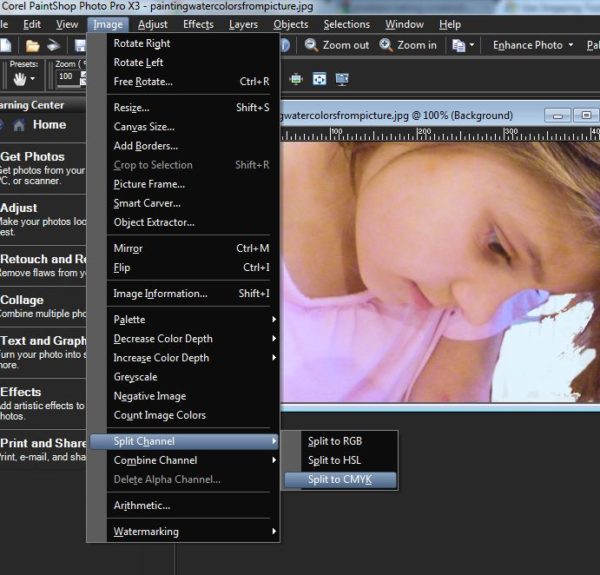
I open this picture with Paint Shop pro, then will go to the Image Menu, then Split Channel, then split to CMYK, as shown on the following screenshot :
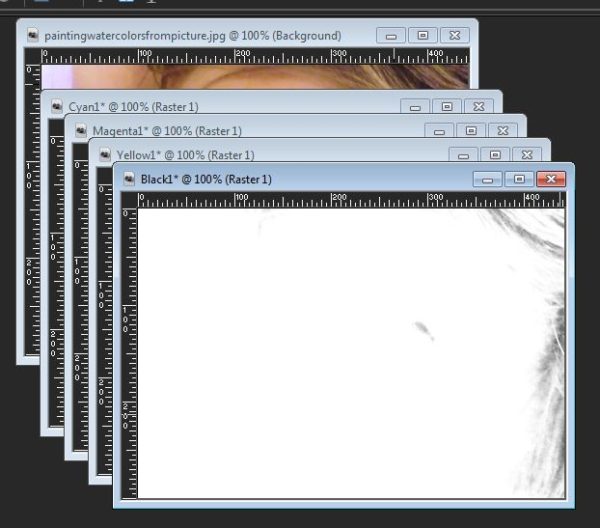
I then will have my original picture, plus 4 black and white pictures, yellow, Magenta, Cyan and Black.
I am usually not using the black one. Starting with my yellow picture I will try to paint my yellow under-layer using my black and white picture as a guide, the more black, the more yellow I will use. I guess you could try to colorize the b&w picture in yellow if that’s easier that way, but I like better working with the b&w.
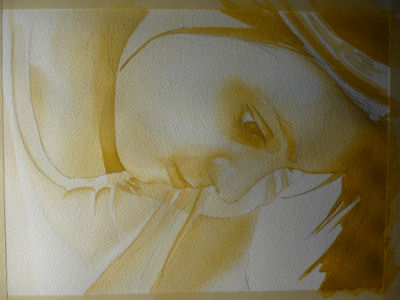
So this is my yellow layer in Paint Shop Pro :
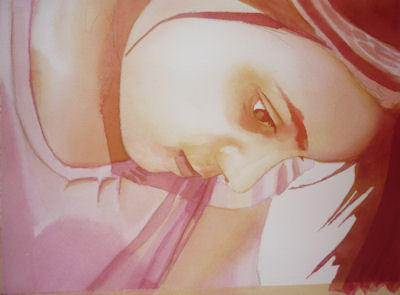
And my yellow layer in watercolors :
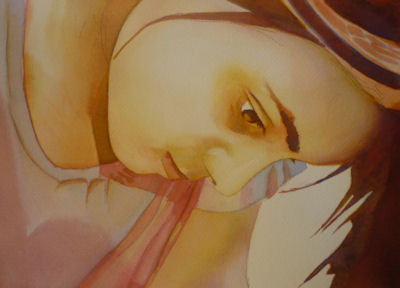
I do the same for the blue and the red layer, using my pictures as a guide :
I am a Blick Art Materials affiliate and I receive a small compensation for sales. That does not effect in any way the cost of the purchaser’s order but it helps me keeping the content of this blog free.
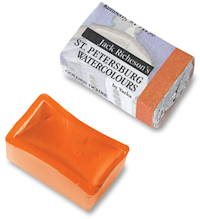
Same palette of traditional colors the great masters used a century ago. Liquid-poured means semi-moist pans respond instantly to a wet brush. 24 pans in plastic case. Also individual pans. – Master Set
Originally from France, I have been living in North Vancouver, Canada for the past 20 years.
My work has been collected and exhibited extensively in Canada and internationally. I am also part of the Art Rentals and sales program of the Vancouver Art Gallery.
Many of my paintings have been published in Art books and magazines (Artist Magazine, Watercolor Artist Magazine, Acrylic Magazine, International Artist Magazine). I wrote 2 art instruction books with North Light/F+W Books.
I have been writing for the last 5 years for my blog: paintingdemos.com, that has a mailing list of about 10 000 subscribers and about 20 000 visitors per month.
I am an active member in the community, as a co-founder of the North Shore Art crawl, a co-founder of a weekly life drawing group, a board member of the North Vancouver Arts Council, and have been invited as a juror for public art, art grants and juried exhibitions. You can read more about my collaborations here.
[…] You can use Paint shop pro or another image editing software as an help to show you where are the yellow, red, and blue located : see tutorial here […]
M-ART-in
I dig this style. I am trying to paint portraits too, but I do have some questions.
1. When you paint the layer you do it mono-chromatically, Do you let it fully dry before starting the next layer?
2. How wet is the paper? or are you just using a wet brush?
Thanks M-ART-in for your questions.
– yes, this is very important to let the paper dry thoroughly in between layers, you don’t want the colours to mix you want them layered.
– For this particular style, I will wet the paper a bit when I want soft edges but most of the time will work on dry paper as I want to be able to control where the paint is going. Try to pay attention to edges and soften them with a brush and water as if you have to many hard edges on a portrait it might look not natural.
M-ART-in
Ok Thank You. When I lay the individual colors and do my washes, should I go ahead and do it monochromatic until finished with that color, then let it dry and add the next color as before?
How do i prevent the picking up of the prior colors pigment?
Yes exactly, you paint one color after another, waiting the to dry in between.
You have to be very careful in the subsequent layers to prevent any of the paint to lift off.
pat71477300
Sandrine, Do you know of any software which does this on an Apple Macbook?
I don’t know well Apple software, but I guess most imaging software will have a function to separated the CYMK layers. It is used for printing purposes.
Carolyn
I tried several times, but can’t figure out how you did it. Not enough info for me to get it. When I recombine the channels after I have colorized, it just goes back to b&w. I am using pspx5
Hello Carolyn, I am using the split channels black and white pictures as a guide to paint with watercolor, but when I paint the yellow channel for example I am using yellow paint, then I let it dry then I paint the blue then red, on the paper. I am not recombining the channels on paint shop pro, I am layering the watercolors on my paper. Hope that helps 🙂
Carolyn
Thank you. I thought maybe it was done digitally.
Diana
I don’t understand how you were able to put the watercolor on it. Can you show that please?
Thank you for the tutorial 😉 helps me to understand how to use the colours,, now i know i can use more yellow for more black 🙂
but I still hope you can add some marks where to add the other layer,,,


Comments (20)
7 tips to paint skin tones with watercolor layers
[…] You can use Paint shop pro or another image editing software as an help to show you where are the yellow, red, and blue located : see tutorial here […]
M-ART-in
I dig this style. I am trying to paint portraits too, but I do have some questions.
1. When you paint the layer you do it mono-chromatically, Do you let it fully dry before starting the next layer?
2. How wet is the paper? or are you just using a wet brush?
Sandrine Pelissier
Thanks M-ART-in for your questions.
– yes, this is very important to let the paper dry thoroughly in between layers, you don’t want the colours to mix you want them layered.
– For this particular style, I will wet the paper a bit when I want soft edges but most of the time will work on dry paper as I want to be able to control where the paint is going. Try to pay attention to edges and soften them with a brush and water as if you have to many hard edges on a portrait it might look not natural.
M-ART-in
Ok Thank You. When I lay the individual colors and do my washes, should I go ahead and do it monochromatic until finished with that color, then let it dry and add the next color as before?
How do i prevent the picking up of the prior colors pigment?
Sandrine Pelissier
Yes exactly, you paint one color after another, waiting the to dry in between.
You have to be very careful in the subsequent layers to prevent any of the paint to lift off.
pat71477300
Sandrine, Do you know of any software which does this on an Apple Macbook?
Sandrine Pelissier
I don’t know well Apple software, but I guess most imaging software will have a function to separated the CYMK layers. It is used for printing purposes.
Carolyn
I tried several times, but can’t figure out how you did it. Not enough info for me to get it. When I recombine the channels after I have colorized, it just goes back to b&w. I am using pspx5
Sandrine Pelissier
Hello Carolyn, I am using the split channels black and white pictures as a guide to paint with watercolor, but when I paint the yellow channel for example I am using yellow paint, then I let it dry then I paint the blue then red, on the paper. I am not recombining the channels on paint shop pro, I am layering the watercolors on my paper. Hope that helps 🙂
Carolyn
Thank you. I thought maybe it was done digitally.
Diana
I don’t understand how you were able to put the watercolor on it. Can you show that please?
Sandrine Pelissier
Hello Diana, I am using the Photoshop pictures as a guideline to paint the portrait by separating each color.
You can see another example here: https://paintingdemos.com/2012/11/06/watercolor-portrait-painting-tutorial-layering-colors-using-watercolor-crayons-and-wax-paper-cut-out/
bill
where is the watercolor palette in paintshop pro 5 how did u colorise it
cheers bill
Sandrine Pelissier
Hello Bill, I didn’t colorize it, I just adjusted color contrast and balance.
Ricciuno
Thank you for the tutorial 😉 helps me to understand how to use the colours,, now i know i can use more yellow for more black 🙂
but I still hope you can add some marks where to add the other layer,,,
thank you 🙂
How to paint skin tones with watercolor layers
[…] You can use Paint shop pro as an help to show you where are the yello, red, and blue located : see tutorial here […]
Watercolor Portrait Demonstration « Online Drawing Instruction « Online Drawing Instruction
[…] Here I start to add the red, I use black and white pictures of split colors channel to do so, see post here for details […]
Watercolor Portrait Demonstration | The SuperSlinger Site
[…] Here I start to add the red, I use black and white pictures of split colors channel to do so, see post here for details […]
Watercolor Portrait Demonstration :Art Instruction For Beginners – Art Instruction Blog
[…] Here I start to add the red, I use black and white pictures of split colors channel to do so, see post here for details […]
Holly Herick Design
This is fascinating. I might have to try this sometime, maybe with a flower. Thanks for sharing your technique.