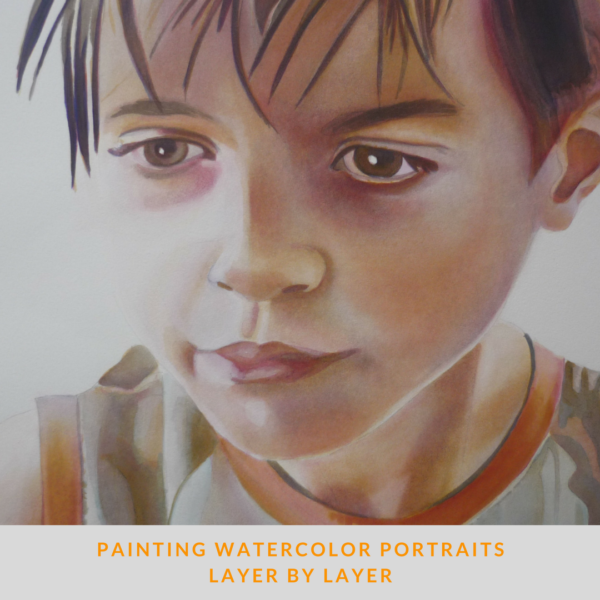
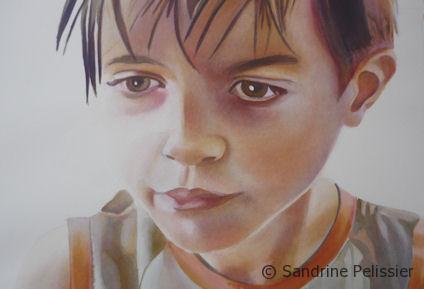
This is a watercolor portrait I painted from a picture of my son. To have more control and be able to focus on edges and values , I did separate each color in primary colors, yellow, red and blue and painted each layer of primary separately.
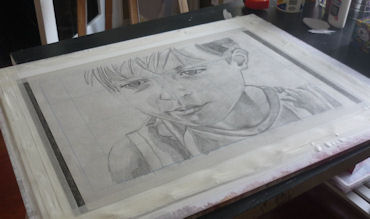
This is my original drawing on newsprint paper. I worked from a picture, with the help of a grid.I don’t make my drawing directly on the watercolor paper so I can erase as much as I want whitout risk of damaging the paper.
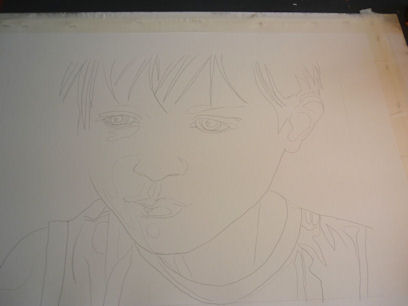
My drawing transfered to the watercolor paper. Next week I will publish a post showing how to make your own light box, this time I used carbon paper.
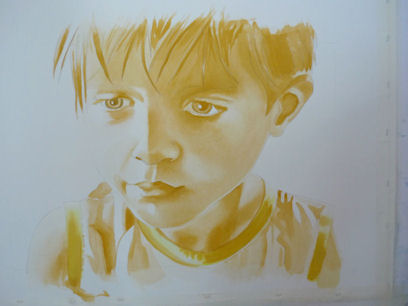
This is the first layer, I used only a Cadmium yellow lemon. I focus on value and edges.
I am a Blick Art Materials affiliate and I receive a small compensation for sales. That does not effect in any way the cost of the purchaser’s order but it helps me keeping the content of this blog free.
Same palette of traditional colors the great masters used a century ago. Liquid-poured means semi-moist pans respond instantly to a wet brush. 24 pans in plastic case. Also individual pans. – Master Set
For the second layer, again only one color, alizarin crimson. When using this technique, it is important to let the paper dry completely between layers so the colors don’t mix wet and become muddy.
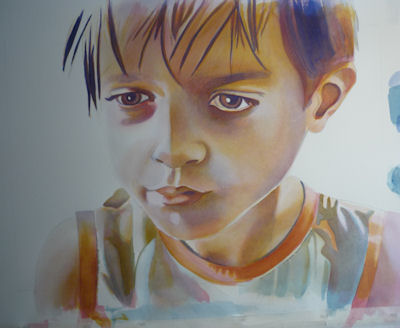
In the third stage I use 2 different blues, a cold blue on the T shirt (Prussian blue) and a warmer blue on the face (Ultramarine blue). When painting the blue and red layers you need a lot less paint than when painting with yellow.
In the last stage, I adjust colors where I need to do it, I add some oranges, browns and purple, I scrub and wash away some paint where I need more light on the face, or to soften some edges.
Originally from France, I have been living in North Vancouver, Canada for the past 20 years.
My work has been collected and exhibited extensively in Canada and internationally. I am also part of the Art Rentals and sales program of the Vancouver Art Gallery.
Many of my paintings have been published in Art books and magazines (Artist Magazine, Watercolor Artist Magazine, Acrylic Magazine, International Artist Magazine). I wrote 2 art instruction books with North Light/F+W Books.
I have been writing for the last 5 years for my blog: paintingdemos.com, that has a mailing list of about 10 000 subscribers and about 20 000 visitors per month.
I am an active member in the community, as a co-founder of the North Shore Art crawl, a co-founder of a weekly life drawing group, a board member of the North Vancouver Arts Council, and have been invited as a juror for public art, art grants and juried exhibitions. You can read more about my collaborations here.
[…] You might also be interested in: Painting watercolor portraits layer by layer […]
Dee Whitney
You share so much of your talent and different techniques I am amazed! Fell in love with your waterlily pond last year and am still learning from your tutorials! Thanks so much!
I a, so excited to try this technique. I love painting faces but can only do black and white because the skin tone overwhelms me too much.
I’m a little confused by your layering pictures. It seems like with your first layer of yellow, there is a much darker hue underneath it, that looks like blue or black. In the example of your son, it looks much darker on the bridge of the nose, in the parts of the hair, and the shadow under the eye etc. it couldn’t just be yellow paint there.
Did you mix the yellow with another color? Or it the paint over ink?
Bonjour Sandrine
Merci pour vos pas à pas qui m’ont particulièrement aidée. Du coup, je me suis lancée et bien que j’ai besoin de m’exercer encore, le résultat est très encourageant. Je vous remercie infiniment pour le temps que vous consacrez à l’élaboration de ces tutoriels qui sont très enrichissants pour les débutants telle que moi.
Christine
Bonjour Christine,
Merci d’avoir commente sur mon blog, ca me fait tres plaisir de savoir que les articles peuvent motiver ou aider d’autres artistes. Si j’avais plus de temps je ferais une version francaise du blog mais pour le moment cela n’est pas possible. En attendant n’hesitez pas a me poser des questions sur les techniques ou autres, et a partager vos impressions.
Au plaisir de vous relire 🙂
Sandrine
Sonia
Lovely portrait – your step by step pictures are so clear, you make it look so simple! I am new to attempting faces (not accurate enough to call portraits), but your method is definitely one I will have a go at.
Katherine
I’m so intrigued about the use of cad yellow as an underpainting! Do you find that it gives the portrait more warmth and vibrancy? Tell me more!
When layering watercolors I am basically mixing my colors on the paper with the three primaries : yellow, blue and red.
I usually try to have a choice of a warm tone and a cool tone for each color. For yellow, my warm tone would be ochre or cadmium and my cool tone would be lemon yellow.
For skin tones I found that Ochre and Cadmium will look more natural for skin tones and I will sometimes use lemon yellow if there is a cool highlight or for clothes.
Layering watercolors allows me to focus on edges and value as I don’t have to think about tone, so I have more control on the paint. Also layering is a great technique to make rich and vibrant complex skin colors.
I am always starting by the yellow layer as yellow is more opaque than blue or red, so it is better to have it under the following layers.


Comments (12)
Jude Blades
thankyou for this. i have been trying to understand this concept but couldnt until i found this little lesson.
Jan Black
Is there a step missing? How was the drawing transferred to the watercolor paper?
Sandrine
I used carbon paper to transfer my drawing onto the watercolour paper. You could also use a lightbox: https://paintingdemos.com/how-to-make-your-own-lightbox-for-tracing-on-watercolor-paper/
How to paint skin tones with watercolor, layer by layer - 7 tips
[…] You might also be interested in: Painting watercolor portraits layer by layer […]
Dee Whitney
You share so much of your talent and different techniques I am amazed! Fell in love with your waterlily pond last year and am still learning from your tutorials! Thanks so much!
Sandrine Pelissier
Thanks Dee, I am happy to hear that 🙂
Alison
I a, so excited to try this technique. I love painting faces but can only do black and white because the skin tone overwhelms me too much.
I’m a little confused by your layering pictures. It seems like with your first layer of yellow, there is a much darker hue underneath it, that looks like blue or black. In the example of your son, it looks much darker on the bridge of the nose, in the parts of the hair, and the shadow under the eye etc. it couldn’t just be yellow paint there.
Did you mix the yellow with another color? Or it the paint over ink?
Thank you!
KUGEL
Bonjour Sandrine
Merci pour vos pas à pas qui m’ont particulièrement aidée. Du coup, je me suis lancée et bien que j’ai besoin de m’exercer encore, le résultat est très encourageant. Je vous remercie infiniment pour le temps que vous consacrez à l’élaboration de ces tutoriels qui sont très enrichissants pour les débutants telle que moi.
Christine
Sandrine Pelissier
Bonjour Christine,
Merci d’avoir commente sur mon blog, ca me fait tres plaisir de savoir que les articles peuvent motiver ou aider d’autres artistes. Si j’avais plus de temps je ferais une version francaise du blog mais pour le moment cela n’est pas possible. En attendant n’hesitez pas a me poser des questions sur les techniques ou autres, et a partager vos impressions.
Au plaisir de vous relire 🙂
Sandrine
Sonia
Lovely portrait – your step by step pictures are so clear, you make it look so simple! I am new to attempting faces (not accurate enough to call portraits), but your method is definitely one I will have a go at.
Katherine
I’m so intrigued about the use of cad yellow as an underpainting! Do you find that it gives the portrait more warmth and vibrancy? Tell me more!
Sandrine Pelissier
When layering watercolors I am basically mixing my colors on the paper with the three primaries : yellow, blue and red.
I usually try to have a choice of a warm tone and a cool tone for each color. For yellow, my warm tone would be ochre or cadmium and my cool tone would be lemon yellow.
For skin tones I found that Ochre and Cadmium will look more natural for skin tones and I will sometimes use lemon yellow if there is a cool highlight or for clothes.
Layering watercolors allows me to focus on edges and value as I don’t have to think about tone, so I have more control on the paint. Also layering is a great technique to make rich and vibrant complex skin colors.
I am always starting by the yellow layer as yellow is more opaque than blue or red, so it is better to have it under the following layers.